

2008年8月28日星期四
Invitation Card制作简介
首先在Painter里绘出背景用Texture。
Texture-1:

Texture-2:
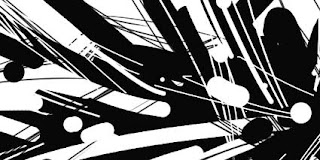
Texture-3:

接下来转去Photoshop里制作邀请卡的彩色背景。
用Gradient Tool添入背景色。

加多层layer,
然后用Texture-1来make selection,
添入另一色彩,将layer blend mode设为Hard Light。

再加多层layer,然后用Texture-2来make selection,
添入另一色彩,blend mode设为Overlay。

再加多层layer,然后用Texture-3来make selection,
添入另一色彩,blend mode设为Hard Light。
好了,背景制作完成。

接下来import去CorelDraw进行排版设计,
完成图如下:

今天看到印出来的成品了,颜色效果很美!嘻嘻!~

2008年8月20日星期三
《Feel the Color》
最近看了许多的作品,和试验了一些笔刷,
越来越感到自己不会用颜色了!
看着每个人的作品,都是拥有美丽的颜色,
而我的呢?唉!~
实在要认真思考如何运用色彩,
也要练习运用笔触来作画了!
刚完成了这张作品《Feel the Color》,
静坐沉思回想当年会运用的颜色与彩法吧!
然后多加练习,彩出更加棒的作品吧!
加油啊!老头! >_<
越来越感到自己不会用颜色了!
看着每个人的作品,都是拥有美丽的颜色,
而我的呢?唉!~
实在要认真思考如何运用色彩,
也要练习运用笔触来作画了!
刚完成了这张作品《Feel the Color》,
静坐沉思回想当年会运用的颜色与彩法吧!
然后多加练习,彩出更加棒的作品吧!
加油啊!老头! >_<

2008年8月19日星期二

2008年8月12日星期二


订阅:
评论 (Atom)